Jun
If you use an edged tool for any length of time, eventually it’ll need sharpening.
This is especially true with machetes and axes. They are tools designed for impact, and with impact comes the potential for damaging and blunting the blade.
Some machetes and axes are actually supplied with a semi blunt edge, so you’ll need to sharpen it before use.
In this handy guide, we’ll show you the steps for getting a decent edge on a blunt or damaged blade using a great little sharpener called ‘The Puck’.
Before you start
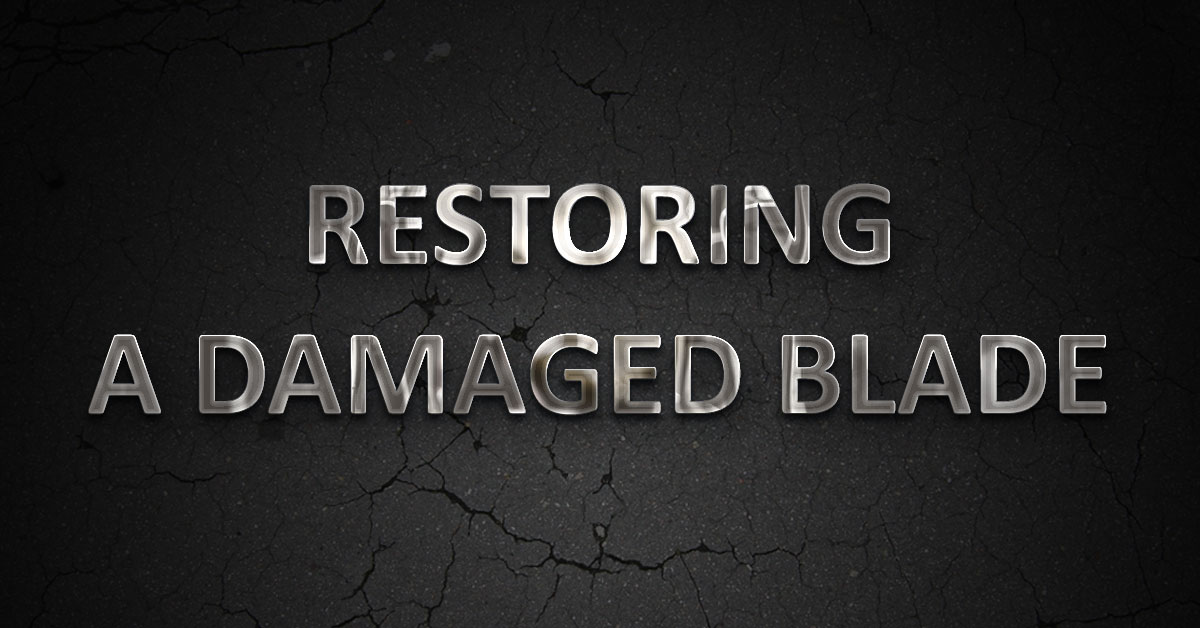
Before we start to sharpen any blade it’s good to decide exactly what the desired outcome is. In this instance, I will be looking to put a usable edge on a damaged machete.
I’m not looking to put a superfine edge on the blade, as it’s a tool for chopping and clearing and a superfine edge would not necessarily be suited to the kind of tasks the machete needs to perform.
I’m really more interested in removing the nicks and damage and getting a good, usable edge than making it razor sharp.
To repair and shape this blade to a usable edge, I’ll be using a Lansky ‘The Puck‘.
Like the name suggests, it’s a puck shaped sharpening stone with two sides – one coarse side and one medium side.

It is designed specifically for sharpening thicker, heavy duty blades such as lawn mower blades, axes, machetes and shovels.
Using The Puck
I’ll start out using the coarse side as the blade has quite a bit of damage.
Gripping the Puck in one hand, and the blade to be sharpened in the other and making sure that no fingers are protruding over the edge of the Puck, you then use small, overlapping circular motions to rub against the blade edge.
Please note that blade edges are angled and it is important that the movements take this angle into account by angling the Puck against the blade to match.
It’s important not to place too much pressure on the Puck – you only need light to medium pressure for it to be effective.
Continue the small overlapping circles all along the edge to be sharpened.
Once you complete this with the coarse side and any nicks have been removed to your satisfaction, flip the machete over and repeat this action on that side of the blade.
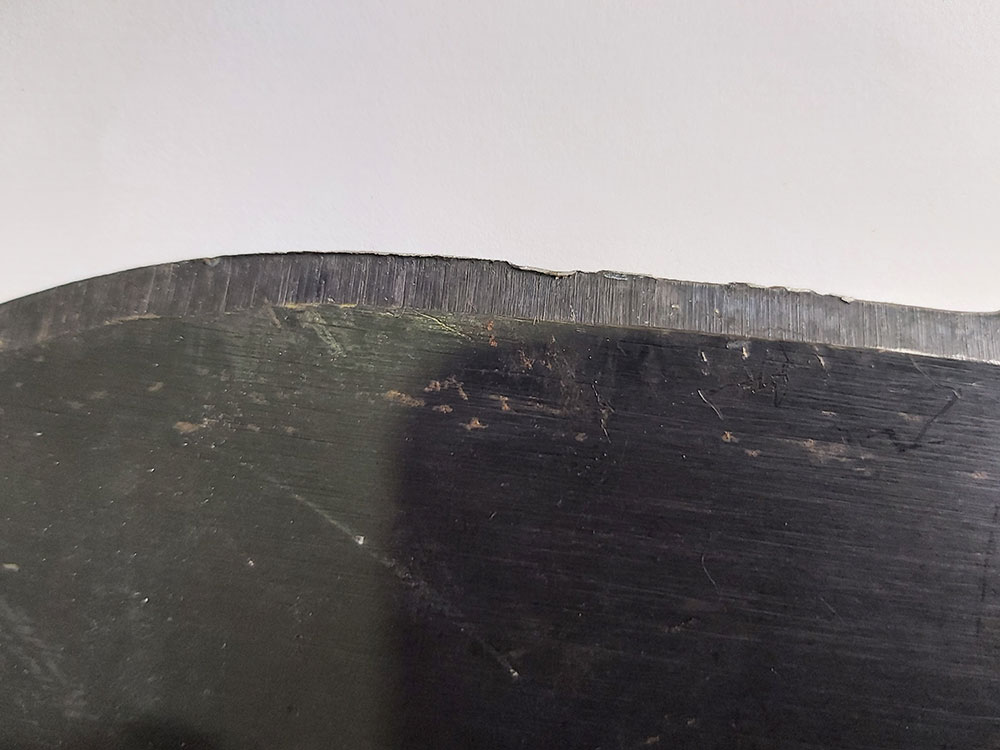
This is the same blade as shown above after using just the coarse side of the Puck for less than five minutes. As you can see, the nicks and damage have now mostly gone.
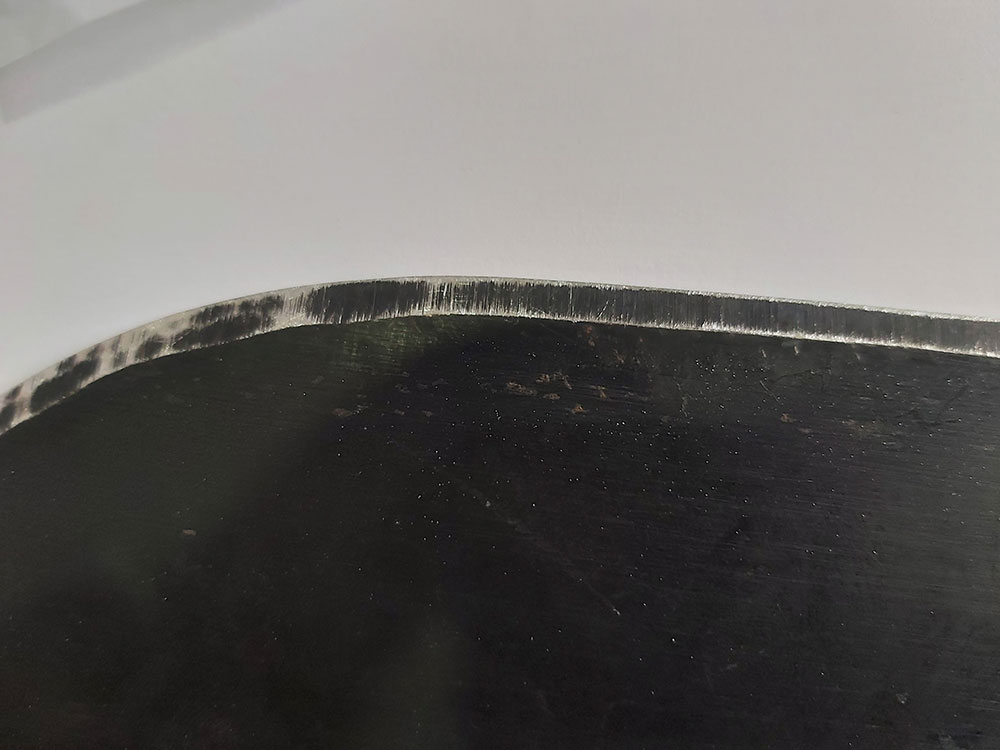
Continue with the coarse side until you’re satisfied and then do the same on the other side of the blade.
Them you repeat this action on both sides of the blade but using the medium side of the Puck instead, which further refines the blade edge.
Please note that if the blade is not damaged, worn or nicked you do not need to use the coarse side first, you can simply use the medium side to return the edge to sharpness.
The Results
I spent around 15 minutes with the coarse side in all, and that was for both sides of the blade.
I then used the medium side of the Puck to further refine the edge.
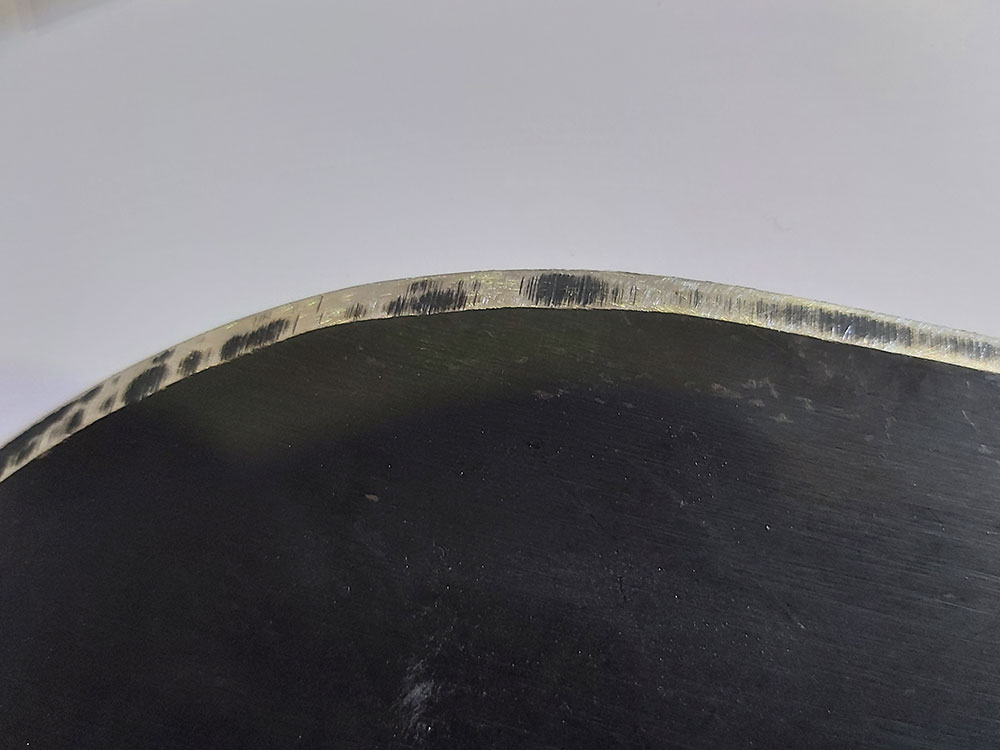
What was once a completely blunt and damaged machete now has a cutting edge again!
It would be possible to refine this edge even further by continuing to use the puck, or using a finer grit if I really wanted a razor sharp edge.
However, given the tasks the machete is destined to carry out, this kind of finish would suffice.
I was pleasantly surprised as to just how easy it was to return the damaged blade of the machete back to a sharp usable edge, with the nicks removed.
It takes a bit of time and patience, but once you get into the rhythm it is incredibly straightforward, and the results are really impressive.
If you have a damaged blade that needs some TLC, you need to take a look at the Puck! It’s a must have for anyone using bladed tools!